

It also has a feature called Gigapixel, which, instead of being focused on maps, lets users build a story around another image, which merits the reader being taking through it in more detail.
This screencast outlines how to use the Gigapixel tool in particular, and the details below are based on an edited version of the screencast instructions.
For examples of the varied ways in which Gigapixel can be used take a look at how it was harnessed to drill down into the detail of a piece of art in the example on this page, or even to take viewers around a fictional map in this Game of Thrones case study.
There are three key stages to building a Gigapixel (Storymap does outline the first two stages in some detail on its own site, so the first two stages below are fairly brief, but shown in full in the screencast).
1. Firstly, you need to do some work on the image you want viewers to engage with so that you end up with a collection of so-called 'tiles', which together make up your final image. This is achieved using Zoomify in Photoshop. And you need the full version of Photoshop to access that tool.
Storymap advises recording the image size at this stage as you'll need it for later but if you download your image from Flickr, you can see the dimensions there. You then need to apply Zoomify, under export, as Storymap explains via the first 'show me how' link on this page, which leaves you with a folder of those 'tiles'.
2. Stage two involves publicly hosting that folder, which you do using Google Drive. Again you can see Storymap's instructions for this via the second 'show me how' link on this page. This involves simply dragging and dropping the folder over from where you saved it via Photoshop, and then making it public (as shown in the screencast, via Storymap's instructions and in the image below).
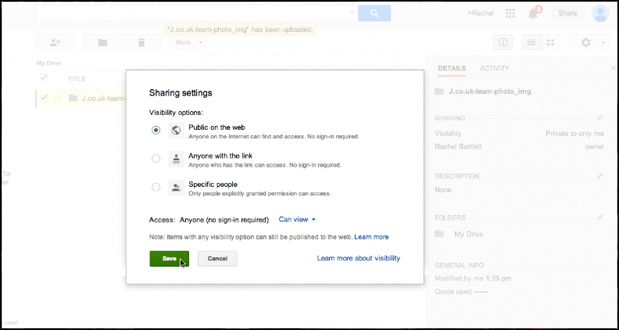
It may take a few moments but eventually you should see the change to the sharing details, and you should also now be able to see a web url under the heading hosting. You will need that link later.
3a. Now it's about building your Gigapixel. So go to the StoryMapJS website, click 'make a storymap now' and sign in to your Google Drive account through the site. Now select Gigapixel.
3b. This is where you paste in that URL for the publicly hosted image file in Google Drive from earlier. You also need to add in the original image dimensions.
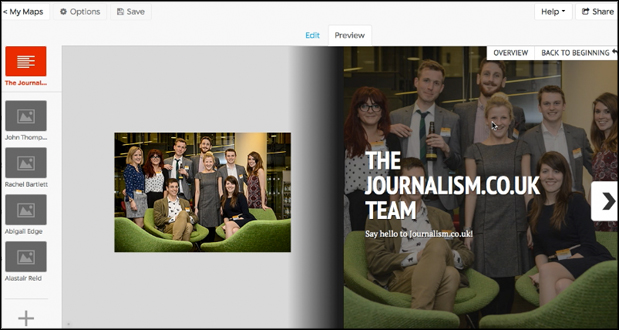
3c. The first screen you see is the front page of the Gigapixel. Here you can add a headline and a description that can also have links included in it.
Each interactive is made up of a number of slides. On each slide you can add an image, either one that is hosted on Google Drive or you can just add one from your computer. If you do add an image make sure you include any relevant credit and caption.
There are also a number of other ways you can customise each page of your interactive under slide options. This includes adding a coloured background to a particular slide, or even a background image to appear behind your headline and description, as shown below.
You can also apply a background colour to the entire interactive under the options tab in the top left hand corner.
3d. Once you have made your cover slide, you need to add your other slides to make up your interactive. Simply click on the Add slide button, place the cursor in the right place for your first zoom, and add any relevant headline, description, links and other images. Storymap suggested to me, for example, that if you're creating a Gigapixel of a crowd of people, and want to pick out individuals, you could add a headshot photo on the right hand side, to make it clear who you are talking about (in addition to the zoomed in image on the left). Use the instructions from above on adding 'an additional image'.
Continue working through your photo, adding a new slide for every new piece of the image you wish to zoom into.
3e. At any point you can click on preview to see how the final piece will look, and the journey your viewer will take. You can re-order slides manually by dragging and dropping them around, and you can go back and adjust the marker where necessary.
3f. When you're finished you can share the link for the piece on social media networks, or embed the interactive into your website. Note that the embed code is responsive, so the width will adapt based on where you enter the embed code.
See a copy of my test Gigapixel below, to show how the layout has adapted to the width of this article page.
Free daily newsletter
If you like our news and feature articles, you can sign up to receive our free daily (Mon-Fri) email newsletter (mobile friendly).


