

And as with many journalistic tasks, there are web tools ready and waiting to help save you time. In this week's screencast we look at two examples: Transcribe and oTranscribe.
Below are written instructions on their different features, based on the video tutorial above. Both should be used in Chrome, although oTranscribe can also be used in Safari.
Transcribe
1. Visit transcribe.wreally.com (you will need to pay an annual subscription of $20 (£11.88) to use the platform).
2. Add your audio. Transcribe outlines the different formats it accepts. If you were to use an unsupported format you may find it has no sound. Don't panic – you just need to convert it to a valid format.
3. You can play your audio with by pressing the play button or using the shortcut Escape key on your keyboard. You can also fast forward (F4), rewind (F3) and you can also speed up (F2) and slow down your audio (F1).
4. Add timestamps using the 'insert timestamp' tool, to mark noteworthy points.
5. There are a number of ways to highlight certain parts of your transcript. For example, you can make text bold and put it in italics, and underline it. You can also add bullet points and numbered bullet points. And you can add links by highlighting text and hitting the hyperlink button.
6. A recent feature added to Transcribe is Dictate, which enables you to read into Transcribe and it will take down what you're saying, as accurately as it can. So you can add notes to your transcription, for example.
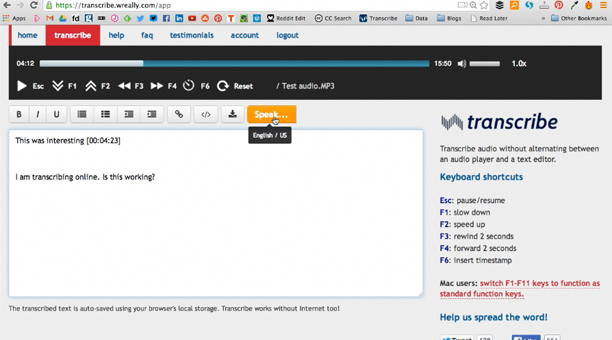
7. When you have finished you can save your transcript as a text document, or just copy and paste the text out of Transcribe.
8. A great feature of Transcribe is that even if you leave your browser or accidentally hit back, Transcribe will keep your text in the box the next time you go to use the tool. You will have to add your audio file in again, but you won't lose your transcription, which can be a life saver!
9. It is also worth noting that Transcribe states that it also "works without internet too", so once you have set up the page, you can move offline to carry on with your transcription, such as while you are on the train.
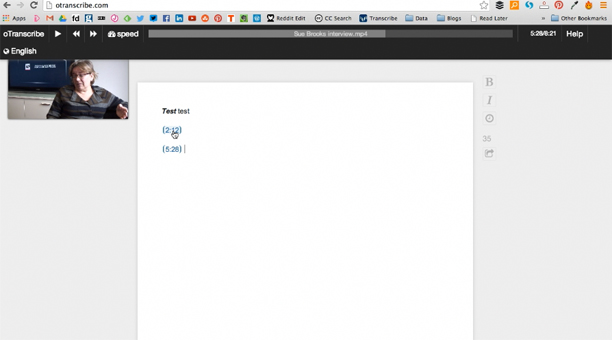
oTranscribe
1. Visit otranscribe.com (this is a free tool).
2. This platform lets you transcribe both audio and video, which is handy if you want to transcribe a filmed interview for example, and saves you having to have already exported it as audio only. So again, you find your media file, and insert it.
3. Again you have the ability to play, using the Escape shortcut again, or rewind and jump forward.
4. You can also make text bold, which you can do by either pressing the bold button or using the standard keyboard shortcut of control b, or command b on a mac, same for putting text into italics.
5. Just like Transcribe, you can also add timestamps to mark your work in oTranscribe with the relevant time of the audio. And these timestamps are interactive, so you can click on them and it will actually move your audio marker back or forward to that point.
Journalists can perhaps use this to either listen to their audio in full first, hitting timestamp at the most interesting points they then want to go back and transcribe, or use it while they are transcribing, so they remember where those parts were in case they need to go back, or edit out that soundbite in audio editing software.
6. You can then either copy and paste your text out of the platform, or turn the transcript into a markdown or text doc. Or you can send it to Google Drive, once you have linked up your Google Drive account, which is great for collaborative projects in particular.
7. OTranscribe is also available in different languages.
Free daily newsletter
If you like our news and feature articles, you can sign up to receive our free daily (Mon-Fri) email newsletter (mobile friendly).
Related articles
- Three free AI-powered transcription tools for journalists
- 38 mojo apps from BBC trainer Marc Blank-Settle
- What will be the lasting legacy of the pandemic on the digital media world?
- Audio, the least stressful medium for news? Yes and no
- James Hewes, CEO of FIPP, on the legacy of the pandemic on digital media


